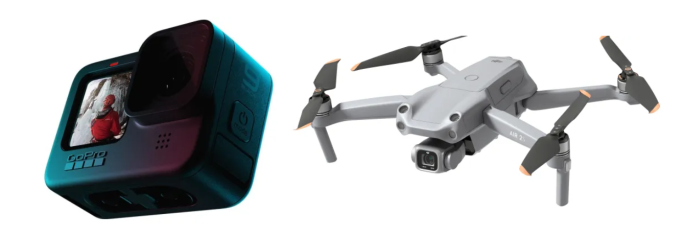
If you are new to shooting your new GoPro or DJI drone and want to learn how to get those fantastic shots you see from experienced usres, here is a starting point that is very easy to digest and get you up and running and on your way.
I write occasionally of recurring themes I see in the various newsgroups and social media sites I frequent, as well as in questions received from readers here at Auscam Central.
Another common one is “what camera do I need to … (fill in the blanks yourself?”
Let’s get one thing straight up front.
The camera does NOT create the photo.
What it does is record a moment in time – or moments over time in the case of video – according to the a) instructions given to it and b) using the available light for that purpose.
If all you are doing is recording a memory and have no desire to be in any way creative, by all means set the camera or camcorder on “A” for “Automatic” and simply press the button. People have been doing that since the camera obscura was invented by the ancient Greeks and Chinese – no-one seems to know who came first.
And then you can stop reading right now.
Basic Factors
But if you want creativity in your photography or video shoots, then you need to become familiar with a few things, and once understood, these will take you beyond the “happy snapper” level.
These factors apply no matter you are shooting with a smartphone, GoPro, mirrorless 4/3rds model, dSLR or even a cinema camera.
The basic rules I apply to my Blackmagic Pocket Cinema Camera 6K Pro are identical to those to be used on any other camera device.
They revolve around the 6 parameters of:
- Light
- Aperture
- Focus
- Shutter Speed
- ISO
- Composition
Light
Firstly, and pretty obviously, if there is no light, there is no way you can capture an image. But as important as having light is how you use that light. My friend Peter Aitchison, one of Australia’s best photographers, once said to me photography is “painting with light”, a phrase that has stuck with me.
Have a look at any decent TV drama – I favour BBC productions, especially the period dramas it does so well – and watch how light is used to create a particular ambience, emotion or tension as well as simply lighting the set.
Lighting is a specific skill and is why there are separate people in TV or film industry who specialise only in lighting. In the credits, they are often called the Gaffer.
The properties of light you need to understand to get best effect include of course colour, but also colour temperature and strength.
I have a feature on the basics of lighting on the Australian Videocamera website at https://filmvideoandvirtualreality.wordpress.com/basics-of-lighting/
Aperture, focus and shutter speed
These three are intertwined and changing one will affect the other.
The aperture on a camera (some call it an iris in video) dictates the amount of light reaching the sensor to record the image. By using the aperture settings you can make sure there is enough light to create the image (prevent under exposure) or lessen the amount of light to stop an image getting overexposed.
Aperture is measured in f stops – f2.8, f5.6, f8, f11, f16 and f22. The larger the number, the smaller the “hole” – the aperture- to let the light on to the sensor.
In conjunction with the lens and focal length of the lens, you can also dictate what is called the depth of field in an image. This can get complicated, but in essence it is what part of an image is in focus and what is not.
For example, using depth of field you can set the aperture in concert with the lens so the subject 2 metres from you is pin sharp focus, but the background is blurred. A form of this is the so called “bokeh” effect.
Note: Cameras such as GoPros and many drone units have a fixed aperture of usually around 2.8. This means you have to use alternate methods to get any effects / techniques obtained by changing the aperture. One way is to use ND filters and there is a tutorial on that here.
Focus might seem obvious but there is a skill involved in this too. Getting the subject and keeping it in focus might seem like a no-brainer, but in video especially, sometimes you want to switch between what is in focus to something else being in focus, so this is something that needs practising.
Shutter speed is how long the shutter stays open to catch the available light, and again, by controlling this you can get some interesting effects.
In sport, with a fast shutter speed you can freeze a race car but blur the background, or with a slow shutter speed, get that dreamy moving water look.

Shutter speed also plays a major role in creating slow motion, and there is a tutorial on that here.

I did a tutorial on depth of field, focus and shutter speed during one of my trips up north to Exmouth and you can read that here.
ISO
In the “old days” this was called ASA and referred to the “speed” of a piece of film stock. The speed was a reference to how it reacted to quantities – or lack of – light.
This still applies today, but of course in the digital world there is no film as such.
Modern day cameras have astonishing ISO ranges and what they do is increase or decrease the sensitivity to light. This means that in low light, cranking up the ISO assists in the exposure, but be aware, as ISO increases, so does the graininess of the image and this is caused by digital “noise”. Once again, while upping the ISO can compensate for low light, you cannot beat adding the real thing.
Composition
Composition refers to how the subject(s) in your image, and the image overall “looks”. The whole idea is to make an image that is either pleasant to the eye or assists in telling the story. Or both.
Of course, if the story demands it, a composition can also create a jarring image.
As a sideline, checking the composition of an image makes sure there are no glaring errors. A classic example of this was in the 1960s with the UK version of the TV show Robin Hood which of course was set in the Middle Ages.
The show’s titles started dramatically with Robin firing an arrow from his bow and the camera following it. Sadly, someone forgot to check the trajectory and consequently the arrow flew neatly past a long line of telegraph poles.
A common newbie mistake is finding you have a tree or other object growing out of someone’s head.
Composition is an art form to itself and most of it comes from watching others who have been doing it for years (think directors like Stanley Kubrick for example) and sheer trial and error.
There are some tools there to help you though and one basic one is the grid lines you can overlay on your viewfinder / LCD on many cameras.

The most common “rule” in composition is the Rule of Thirds, but this by no means has to be followed religiously every time. The aforementioned Mr Kubrick fastidiously ignored it, breaking every convention in the book by always having his subject at the dead centre of the camera frame.
At the very basic level, before pressing the shutter release you’ll get used to critically looking at how the image in the viewfinder or LCD looks, and scanning your eye over it to make sure there are no things such as shadows encroaching on the image, the horizon is straight, no foreign objects have snuck into frame and so on.
If you want a very good composition reference guide, Adobe has one here.
Conclusion
I have only scratched at the surface of these subjects, but hopefully have given you a starting point to investigate further and hone your skills to make a better and more creative photographer / videographer.
